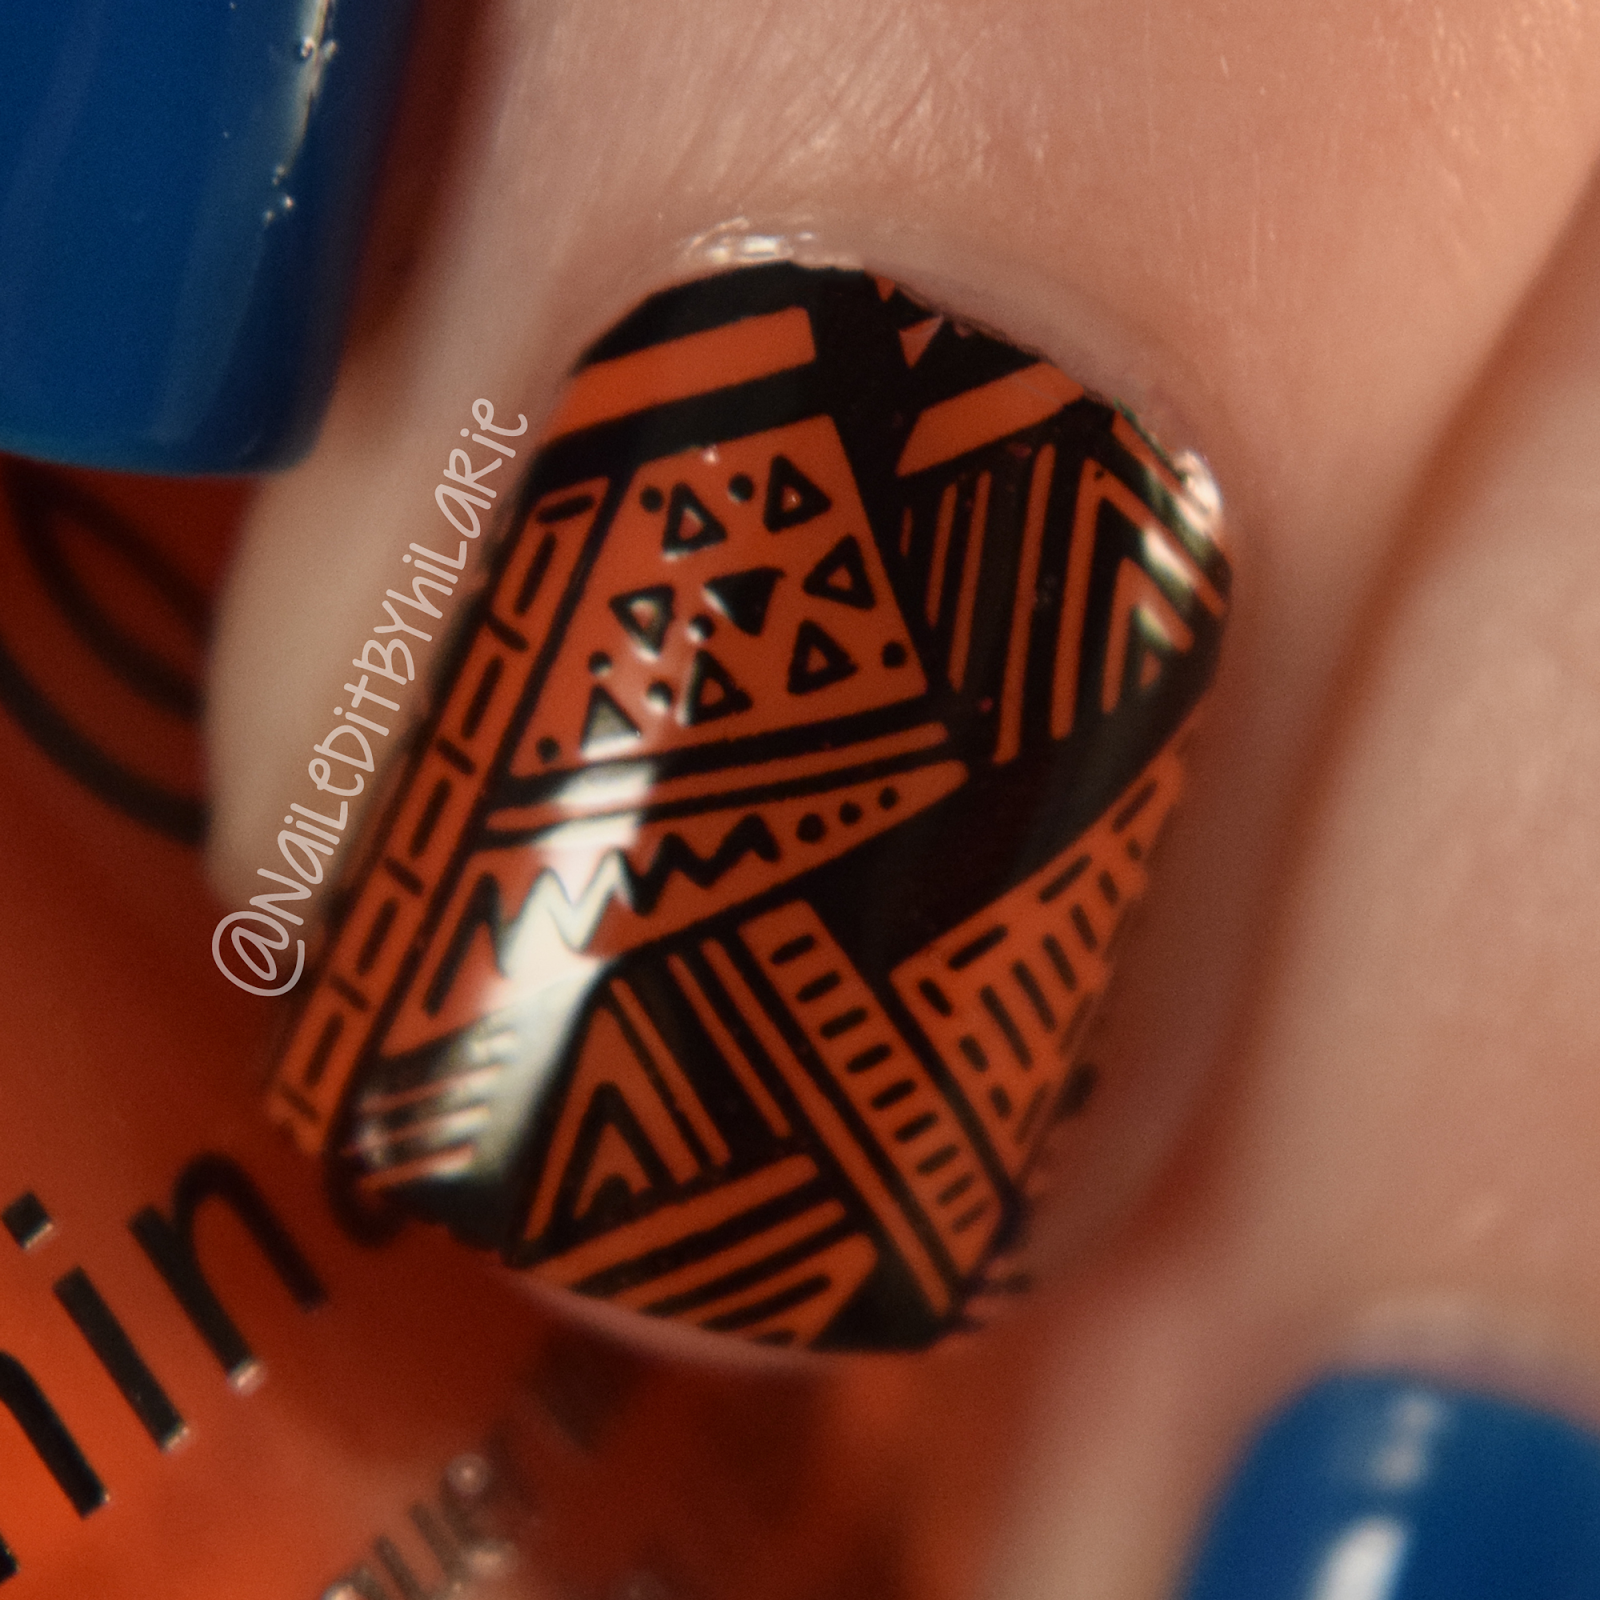
I started with a white base on all fingers. Using a cosmetic sponge, I created the gradient son each nail, pink-orange, orange-yellow, yellow-green, green-blue. After a few coats of sponging the colors were pretty opaque and I applied a fast dry top coat. I then stamped over the gradients, waited for them to dry and applied top coat again.
Polishes used:
Chick Pick Polish - Hot Lips, Marma-laid In The Shade, You Mer-rang?, Get In Lime Boys, and Blue So Fine
Rica's Polish - Blackout
Salon Perfect - Top Coat
Bundle Monster plate BM-XL108
Showing posts with label nail art. Show all posts
June 29, 2015
June 25, 2015
Land Of The Free Duo
The Land Of The Free Duo is a Fourth Of July Duo from Polish'M and Painted Polish. As soon as I saw the first swatches of this duo, I was in love. Glitter crelly and full coverage glitter and 'Murica?! Yes, please!
"Life, Liberty, And The Pursuit Of Holo" is Painted Polish's contribution. It is a full coverage glitter polish with red, blue, and silver holo glitters. In the swatch I used one regular coat, one sponged coat, plus top coat. I have a few of Lexi's polishes already and love every one of them. I actually won Drunk On Holo in a giveaway and that started my holo obsession.
"American Spirit" is Polish'M's contribution to the duo. It is a white crelly with red, white, and multiple shades of blue matte glitter, micro flakies, red and blue shimmer, and some gold and silver holo. In the swatch, I used two to three coats plus top coat. This is my first Polish'M polish (formerly Lacquerlicious) and it's so perfect. This duo is still available in Michelle's shop and I highly recommend picking it up before it's sold out for good!
"Life, Liberty, And The Pursuit Of Holo" is Painted Polish's contribution. It is a full coverage glitter polish with red, blue, and silver holo glitters. In the swatch I used one regular coat, one sponged coat, plus top coat. I have a few of Lexi's polishes already and love every one of them. I actually won Drunk On Holo in a giveaway and that started my holo obsession.
"American Spirit" is Polish'M's contribution to the duo. It is a white crelly with red, white, and multiple shades of blue matte glitter, micro flakies, red and blue shimmer, and some gold and silver holo. In the swatch, I used two to three coats plus top coat. This is my first Polish'M polish (formerly Lacquerlicious) and it's so perfect. This duo is still available in Michelle's shop and I highly recommend picking it up before it's sold out for good!
June 9, 2015
Sparkle Pretty Polish - 4 Freedom Trio
I have a brand new indie brand to share with y'all today! Sparkle Pretty Polish is releasing two collections for their grand opening, the Fun N Flirty neon collection and the 4 Freedom collection which I will be sharing today! Check out my swatches after the jump!
June 5, 2015
National Donut Day Nail Art
Happy Donut Day everyone! Since I no longer work at Dunkin Donuts (I've moved onto bigger and much better things), I get to actually enjoy today and paint my nails for it! We weren't allowed to have painted nails even if we wore gloves over them and it was torture. I had just started getting into nail art and I couldn't even practice!
Alright, back to today's nails...
I started with a base of Too Yacht To Handle on all but my ring finger. Using a striping brush from my Glam Gadgets set, I painted semi-circles using Coach Ella and filled them in. I took a medium sized dotting tool and made the "edge of the icing" using Nirvana, Pinking Out The Window, and Sugar Cube. I didn't get too close to the edge of the tan to leave some of the "donut" showing. Using the striping brush again, I made sprinkles on my middle finger with Sugar Cube, Treble Maker, and Home Sweet House Music. I didn't have a dotting tool as big as I wanted, so I used the end of a paint brush dipped in Too Yacht To Handle to make the hole in each donut. I waited for these three nails to dry and applied Salon Perfect Top Coat.
For my accent nail, I started with a base of Coach Ella. Using a larger dotting tool, striping brush, and Pinking Out The Window, I created my drips by making three lines from my cuticle toward the middle of my nail and adding dots to the ends of them. I connected the sides of the dots to the line and then connected the lines together with curved lines and filled in. Like with the sprinkled donut nail, I used the striping brush and Sugar Cube, Treble Maker, and Home Sweet House Music for the sprinkles. Finally, I finished with Salon Perfect Top Coat.
Polishes used:
China Glaze - Too Yacht To Handle
China Glaze - Pinking Out The Window
China Glaze - Treble Maker
China Glaze - Home Sweet House Music
Salon Perfect - Sugar Cube
Fresh Paint - Coach Ella
Sinful Colors - Nirvana
Salon Perfect Top Coat
Alright, back to today's nails...
I started with a base of Too Yacht To Handle on all but my ring finger. Using a striping brush from my Glam Gadgets set, I painted semi-circles using Coach Ella and filled them in. I took a medium sized dotting tool and made the "edge of the icing" using Nirvana, Pinking Out The Window, and Sugar Cube. I didn't get too close to the edge of the tan to leave some of the "donut" showing. Using the striping brush again, I made sprinkles on my middle finger with Sugar Cube, Treble Maker, and Home Sweet House Music. I didn't have a dotting tool as big as I wanted, so I used the end of a paint brush dipped in Too Yacht To Handle to make the hole in each donut. I waited for these three nails to dry and applied Salon Perfect Top Coat.
For my accent nail, I started with a base of Coach Ella. Using a larger dotting tool, striping brush, and Pinking Out The Window, I created my drips by making three lines from my cuticle toward the middle of my nail and adding dots to the ends of them. I connected the sides of the dots to the line and then connected the lines together with curved lines and filled in. Like with the sprinkled donut nail, I used the striping brush and Sugar Cube, Treble Maker, and Home Sweet House Music for the sprinkles. Finally, I finished with Salon Perfect Top Coat.
Polishes used:
China Glaze - Too Yacht To Handle
China Glaze - Pinking Out The Window
China Glaze - Treble Maker
China Glaze - Home Sweet House Music
Salon Perfect - Sugar Cube
Fresh Paint - Coach Ella
Sinful Colors - Nirvana
Salon Perfect Top Coat
June 4, 2015
Chick Pick Polish - Spring Fling
I hope you're ready for some beautiful matte swatches! Today I have the Spring Fling collection from Chick Pick Polish (minus On The Brink Pink, plus Hot Lips, because I liked that pink better). After receiving a bad batch, they were quickly replaced and the replacements are so perfect!!You ready? This is a long one...
May 22, 2015
Tribal Stamped Accent Nail
Did a simple stamped accent nail for the weekend. I love how it turned out and I'm so excited my stamping has improved so much in just a few weeks!
Polishes:
Julep - Oxygen Smoothing Base Coat
China Glaze - License & Registration Please
China Glaze - Pop The Trunk
Rica Polish - Black Out
Julep - Oxygen Top Coat
Stamper
Bundle Monster Plate BM603
May 21, 2015
Striped Water Marble - Pipe Dream Polish
This one's a couple weeks old, but I thought it was too good to not share here. I typically don't water marble on all my nails because of how much polish is used, especially if I do each nail separately, but I was going to enter into a thing and this is what I came up with.
Honestly, I probably should have made a video for this, but I'll try to explain as best as I can...
I use the entire Pipe Dream Polish "A Night In Vegas" creme collection. I started with a white base on my nails and put liquid latex all around my cuticles and finger tips. When I marble, I use a medium sized plastic cup filled about one inch from the top with about room temperature tap water. I also have a long sewing pin and cosmetic sponge nearby for when I start marbling as well as a popsicle stick or orange wood stick. Line up your polishes close to your cup and have them all unscrewed; you'll need to work quickly!
Drop one drop of each color onto the surface of the water, pink, orange, yellow, green, teal, blue, purple, then repeat. Using the sewing pin, drag from the center of the bulls eye to the top, all the way to the edge of the cup, then from the center to the bottom. Wipe your pin on the cosmetic sponge after each line to keep it clean. Starting a couple rings in at the top left of the bulls eye, drag the pin horizontally across the cup. Move down about a quarter or a half inch and drag the pin from right to left horizontally. Repeat until you've reached the bottom. Rotate your cup 90 degrees, the stripes should be vertical now. Drag your pin left and right horizontally down the bulls eye again. Find a section of stripes you like the best and dip your first nail. While still submerged, blow on the polish on the surface. Use the popsicle or orange wood stick to collect the polish on the water. Oncea ll the polish has been removed, pull your finger out of the water. Remove the latex with tweezers, use acetone to clean up around your cuticle and apply top coat.
Polishes:
Salon Perfect - Sugar Cube
Pipe Dream Polish - On The List
Pipe Dream Polish - 110 Degrees
Pipe Dream Polish - Light Of Day
Pipe Dream Polish - High Roller
Pipe Dream Polish - Happy Hour
Pipe Dream Polish - All In
Pipe Dream Polish - VIP Pass
Salon Perfect - Top Coat
Honestly, I probably should have made a video for this, but I'll try to explain as best as I can...
I use the entire Pipe Dream Polish "A Night In Vegas" creme collection. I started with a white base on my nails and put liquid latex all around my cuticles and finger tips. When I marble, I use a medium sized plastic cup filled about one inch from the top with about room temperature tap water. I also have a long sewing pin and cosmetic sponge nearby for when I start marbling as well as a popsicle stick or orange wood stick. Line up your polishes close to your cup and have them all unscrewed; you'll need to work quickly!
Drop one drop of each color onto the surface of the water, pink, orange, yellow, green, teal, blue, purple, then repeat. Using the sewing pin, drag from the center of the bulls eye to the top, all the way to the edge of the cup, then from the center to the bottom. Wipe your pin on the cosmetic sponge after each line to keep it clean. Starting a couple rings in at the top left of the bulls eye, drag the pin horizontally across the cup. Move down about a quarter or a half inch and drag the pin from right to left horizontally. Repeat until you've reached the bottom. Rotate your cup 90 degrees, the stripes should be vertical now. Drag your pin left and right horizontally down the bulls eye again. Find a section of stripes you like the best and dip your first nail. While still submerged, blow on the polish on the surface. Use the popsicle or orange wood stick to collect the polish on the water. Oncea ll the polish has been removed, pull your finger out of the water. Remove the latex with tweezers, use acetone to clean up around your cuticle and apply top coat.
Polishes:
Salon Perfect - Sugar Cube
Pipe Dream Polish - On The List
Pipe Dream Polish - 110 Degrees
Pipe Dream Polish - Light Of Day
Pipe Dream Polish - High Roller
Pipe Dream Polish - Happy Hour
Pipe Dream Polish - All In
Pipe Dream Polish - VIP Pass
Salon Perfect - Top Coat
May 19, 2015
Candied Apple Polish Swatches
I recently purchased a few new polishes from Candied Apple Polish, a glitter topper turned crelly and my very first Mystery Apples! Check out the swatches of these beauties after the break...
May 18, 2015
Harry Potter Nail Vinyls
I had the opportunity to take part in a Harry Potter mani collab a couple weeks ago. Unfortunately, I was crazy busy that week and didn't get to do what I had originally planned so I went super simple, but I'm still happy with the outcome.
I started with my base coat, one coat of Salon Perfect "Gold Leaf", then applied my Salon Perfect Top Coat. The top coat here is not necessary, but once completely dry, it prevents the other layers of polish from lifting in case the vinyls need repositioning. Using tweezers, I applied Lou It Yourself's Harry Potter vinyls onto my nails. On my ring finger, I positioned the lightning bolt, but didn't press it into place as much as the others and left a tiny bit of the vinyl lifted. I painted Salon Perfect "Oil Slick" over it, then peeled off the vinyl leaving the gold lightning bolt. To finish it all off, I topped it with one coat of Salon Perfect Top Coat on my accent nail, and two coats over the others to smooth out the vinyls.
Polishes:
Salon Perfect - Gold Leaf
Salon Perfect - Oil Slick
Salon Perfect - Top Coat
To see the other manis from this collab, check out #HarryPotterAndThePaintedNails on Instagram.
I started with my base coat, one coat of Salon Perfect "Gold Leaf", then applied my Salon Perfect Top Coat. The top coat here is not necessary, but once completely dry, it prevents the other layers of polish from lifting in case the vinyls need repositioning. Using tweezers, I applied Lou It Yourself's Harry Potter vinyls onto my nails. On my ring finger, I positioned the lightning bolt, but didn't press it into place as much as the others and left a tiny bit of the vinyl lifted. I painted Salon Perfect "Oil Slick" over it, then peeled off the vinyl leaving the gold lightning bolt. To finish it all off, I topped it with one coat of Salon Perfect Top Coat on my accent nail, and two coats over the others to smooth out the vinyls.
Polishes:
Salon Perfect - Gold Leaf
Salon Perfect - Oil Slick
Salon Perfect - Top Coat
To see the other manis from this collab, check out #HarryPotterAndThePaintedNails on Instagram.
May The Fourth Be With You - Dark Side Duo
For May The Fourth, Native War Paints and Lou It Yourself put together two Star Wars inspired duos, The Dark Side and The Light Side. Each duo came with some awesome Star Wars nail vinyls and a mani bomb ("Plink"). I picked up the dark side duo. Swatches are after the break...
Star Wars Nail Art
All art was painted using acrylic craft paint and my Winstonia Glam Gadgets brush set.
Polishes:
Salon Perfect - Sugar Cube
Salon Perfect - Oil Slick
Zoya - Imogen
Salon Perfect - Top Coat
May 17, 2015
Stamped Mermaid Nail Art
After multiple failed attempts at stamping, I think I've finally done it! I'm only on my fourth stamper, second brand of stamping polish, and last bit of patience, but I did it right? I can't wait to master stamping so I can share all the helpful hints the nail community has shared with me to help me with this.
I started with a white base, then gradiented over it with my blues and greens. Once it was opaque enough, I applied a holo top coat and then a quick dry top coat. I waited about 10 to 15 minutes before stamping to make sure all my polish was completely dry. I stamped my mermaid scale pattern on each nail, applied top coat again and added rhinestones, pearls, and a seashell charm to complete the look.
Polishes:
Salon Perfect - Sugar Cube
China Glaze - Shore Enuff
China Glaze - My Way Or The Highway
China Glaze - License & Registration Please
Bliss Polish - Holo Bliss Top Coat
Just Ricarda - Blackout
Salon Perfect - Top Coat
April 16, 2015
Game Of Thrones Water Decals
Game Of Thrones is back! While looking for some GOT nail ideas a couple weeks ago I came across these decals from Tentacle Studios. I flipped out! They're so perfect! (They also come with Greyjoy, too, but to be honest they've never done much for me, even in the books.) I had to have them so of course they happened to be out of stock, but a miracle happened and they were relisted the next morning! They arrived just in time for Sunday's premiere and I am absolutely in love with them!
Polishes used:
Sinful Colors - Ruby Ruby
China Glaze - Pelican Grey
China Glaze - Bing Cherry
Wet N Wild - D'Oh!
OPI Matte Top Coat
Polishes used:
Sinful Colors - Ruby Ruby
China Glaze - Pelican Grey
China Glaze - Bing Cherry
Wet N Wild - D'Oh!
OPI Matte Top Coat
April 13, 2015
China Glaze Electric Nights Gitters
My first thought when I saw China Glaze's Electric Nights Collection swatches was OMG SO MUCH NEED! The same thought I have every time they release a new collection. After the initial excitement, I can narrow my choices down to the ones I actually do need (okay... really really want). This time I decided on the three glitters of the collection. My reasoning? I have an amazing neon collection already and I'd feel bad about cheating on it. The glitters, though... I just can't resist! Full swatch photos and reviews after the jump...
April 2, 2015
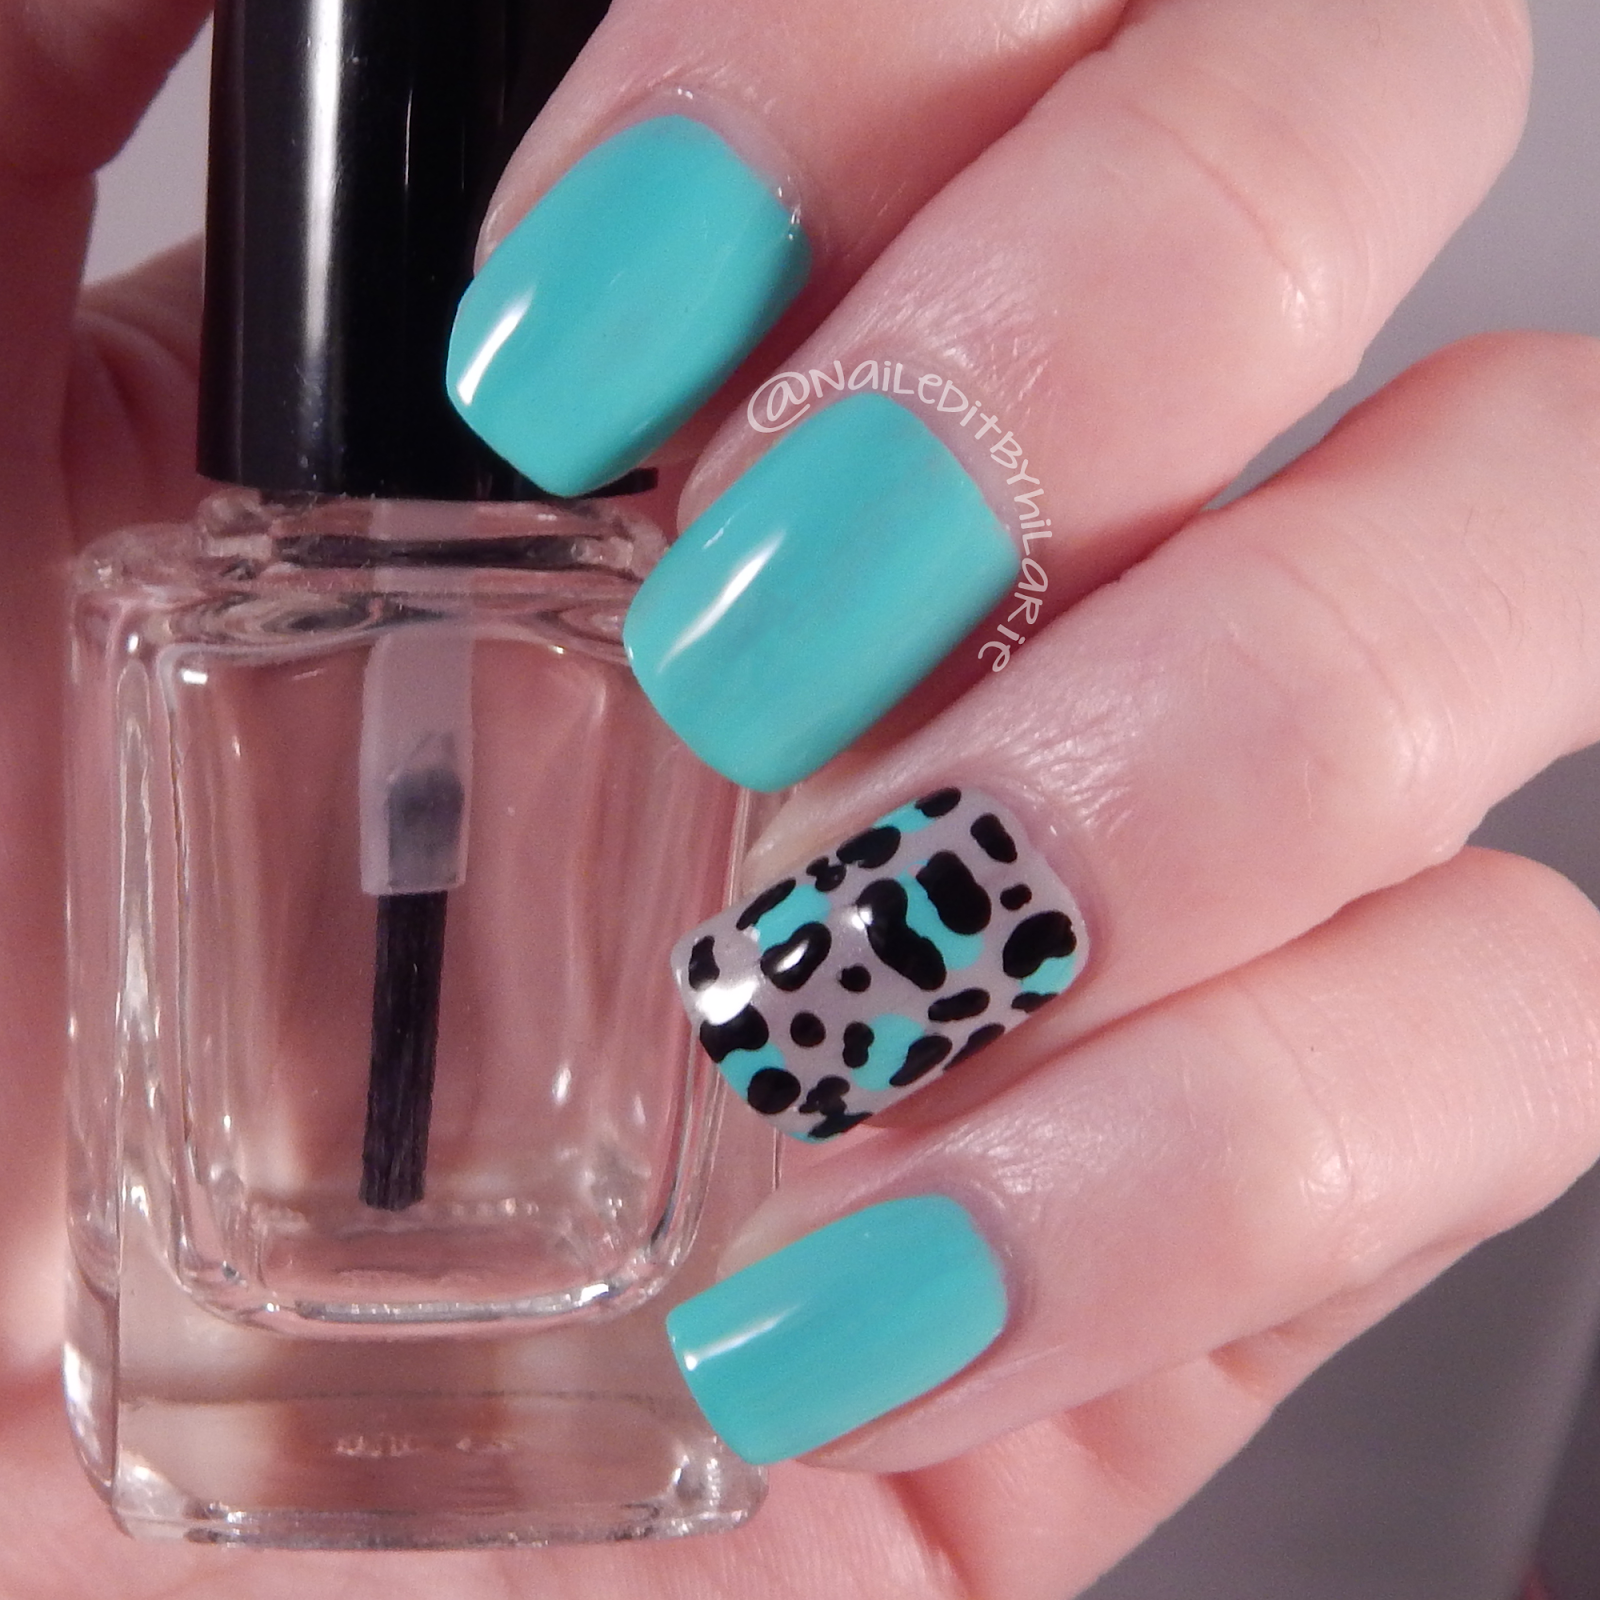
Easy Leopard Print Accent Nail
Four years into nail art and I had never done leopard print. It was one of the first "easy" techniques I pinned on Pinterest and I can't believe I never tried it sooner. It's not really my thing, but it's super quick and simple for an accent nail. My Cindy hand looks almost identical to this one which never happens, even with vinyls.
March 31, 2015
Don't Open Dead Inside Mani
The prompt for day 27 of the nail challenge I did in March was Inspiration. The last few days I ended up getting behind and did 27 of the 29th... The Walking Dead season five finale. Last year, I did a pretty bad TWD inspired mani for the season four finale so I thought I'd do it again. That one was inspired by a poster I have, this one by the t-shirt I was wearing. Details and more pics are after the break...
March Nail Art Challenge (Part Seven)
I completed the whole challenge! I've only ever finished one other challenge before and there were nowhere near this many prompts. I'm very proud of myself for completing this and just wanted to thank @littlemermaidnailedit/@fairytalefinishpolish for the awesome challenge!
March 26, 2015
March Nail Art Challenge (Part Six)
Although part six starts out pretty boring, I made up for it on days 22, 23 and 24. Check it out after the break...
March 22, 2015
March 18, 2015
March Nail Art Challenge (Part Four)
Days 13 through 16 were prompts I've done a million times (or just once), so nothing new for me here. Check them out after the break...
Subscribe to:
Posts (Atom)